X Acto Pencil Sharpener not working, How to Fix?
The X-Acto pencil sharpener is great for getting pencils nice and sharp. But sometimes, it stops working right, and that can be annoying. Don’t worry! In this guide, we’ll talk about common problems with the X-Acto sharpener and easy ways to fix them. Let’s make sure your sharpener stays awesome and keeps your pencils sharp!
What are the causes for X Acto Pencil Sharpener Not Working?
When an X-Acto pencil sharpener is not working, there could be several causes. Here are some common issues,

- Blade dullness: If the blades are dull, they won’t be able to sharpen the pencil effectively.
- Clogged blade area: Sometimes pencil shavings can get stuck in the blade area, preventing the sharpener from working properly.
- Motor issues: If the sharpener is electric and not turning on at all, there may be a problem with the motor.
Why Is Wire So Expensive? All You Need To Know
RLCTALK.COM
- Overheating: Electric sharpeners can sometimes overheat if used for an extended period.
- Worn out parts: Like any mechanical device, parts of the sharpener can wear out over time with heavy use.
How to Fix an X-Acto pencil sharpener?
If your X-Acto pencil sharpener is not working because of reasons, here are some steps you can take to troubleshoot and potentially fix the issue.Let’s get your sharpener back on track so you can keep creating and writing with ease!
| Symptom | Solution |
| Sharpener does not operate at all (“dead”) | Check Power Supply:Test the outlet by plugging in another device to ensure it’s working. Ensure Receptacle and Interlock:Make sure the shaving receptacle is fully inserted into the sharpener.Check the interlock switch, usually actuated by a pin on the receptacle, to ensure it’s intact and functional. Inspect Power Cord:Unplug the sharpener and examine the power cord for any damage like cuts or fraying. Using a sharpener with a damaged cord can be dangerous. |
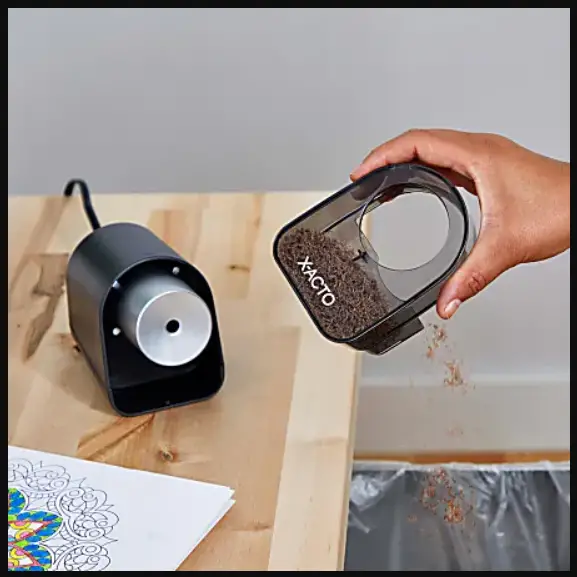
| Sharpener “hums” when a pencil in inserted but the cutters do not rotate (AC motor models) | Empty the Shavings Receptacle:Sometimes, an overfilled receptacle can jam the rotating parts. Make sure it’s empty. Clear Shavings from Cutters and Gears:Unplug the sharpener and remove the receptacle.Tap the sides gently over a wastebasket to loosen any trapped shavings.Check and clear excess shavings from the cutters and internal gear.Use a small tool like a paper clip to remove any remaining shavings. Remove Foreign Objects:Look for and remove any foreign objects around the cutters, gears, or inside the pencil bore.Rotate the size selector (if available) to the largest opening and use a slender tool to move the pencil actuation bar aside. |
| Sharpener “hums” when a pencil in inserted in new product (AC motor models) | A humming sound may indicate internal shipping damage. While the cutter/carrier might rotate freely by hand, it can lock up when powered on. |
| Motor is running but the carrier is notrotating ‐or‐ loud grinding noise | This could mean there’s gear damage inside the sharpener, which can’t be fixed by the user |
| Off‐center sharpening/Sharpens one sideonly/Sharpens to a wood point | Uneven sharpening is a common issue, usually not caused by a defect in the sharpener. Here are some tips for best results: Choose the Right Hole:Use the hole that fits your pencil best to avoid off-centered sharpening. Hold the Pencil Neutral:Hold the pencil without pressing it in any direction to prevent uneven cutting. Let the Cutters Work:Keep the pencil in contact with the cutters without forcing it. Consider Graphite Offsets:Sometimes, the graphite core of the pencil isn’t centered within the wood casing, especially with certain brands. Apply Slight Side Force (if needed):For stubborn pencils, you can apply slight side force towards the excess-graphite side to remove more wood. Severe off-center sharpening may indicate worn internal gear, but this is rare and usually visually obvious. |
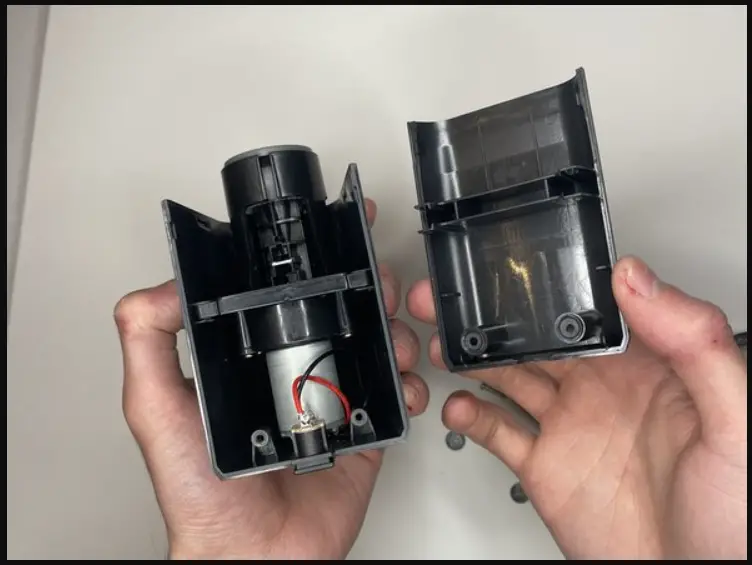
| Cutter carrier is rotating but the pencil isnot sharpening (doesn’t feel like the cutteris engaging the pencil) | This issue is often caused by a foreign object, like an eraser or broken pencil lead, stuck inside the pencil bore. Here’s what to do, Examine the Pencil Bore:Follow the steps outlined in item 3 of the “hums” section to check for obstructions. Remove the Object:If the object is loose, it might fall out the front of the sharpener.If not, try using a paper clip to dislodge it from inside the shavings receptacle compartment.If it can’t be dislodged, you may need to partially or fully disassemble the sharpener. For sharpeners with a “fly-away” cutter system, where the cutter moves out of the pencil bore after sharpening, foreign objects can jam the pencil tip slide. Here’s what to do:Unplug the Sharpener and Remove the Receptacle.Turn the Sharpener Over and Check:Look for and remove any foreign objects, usually broken colored-pencil cores, near the chrome-plated pencil tip slide. |
| Rough sharpening | Rough operation is typically due to worn cutters. Here’s how to check and replace them: Unplug the sharpener and remove the receptacle.Turn the sharpener over and examine the cutting edges of the helical cutter(s).If the edges appear smooth, polished, or glazed, especially near the end where the graphite is sharpened, it indicates wear.If the cutter edges are glazed across most of their width, they need replacement. X Acto offer the following replacement cutters/cutter assemblies:For School Pro® models, replace with Elmer’s item 1674.For Model 41, replace it with Elmer’s item R1827. |
| Dull point after sharpening (sharpeners with helical cutters) | Rough sharpening is typically caused by cutter wear (see “Rough Sharpening” above). Pencil tips are usually sharpened to a usable, but not overly sharp, point. As the cutters wear, the point size gradually increases. |
| Slow sharpening (sharpeners with helicalcutters) | Rough sharpening is often due to cutter wear or shavings buildup (see “Rough Sharpening” above). To remove buildup, unplug the sharpener, remove the receptacle, and turn it over. Use a paper clip to clear shavings from the cutter grooves, rotating the cutter to reach all areas if needed. |
| Broken pencil leads (sharpeners with razorblade cutters) | Broken pencil leads and dull, glazed, or protruding pencil points usually indicate worn razor blade cutters. This wear is typically not visible to the naked eye. |
| Broken pencil tips (colored pencils) | Colored-pencil cores are more prone to breakage than graphite pencil cores. To sharpen colored pencils, follow the tips for “Off-Center Sharpening” above. Avoid sharpening crayons, chalk, and soft, waxy pencils in pencil sharpeners. |

“Unable to fix the X-Acto sharpener” What are the alternatives?
If you’re unable to fix the X-Acto sharpener, or if it’s beyond repair, you might consider these alternatives:
- Manual sharpeners: There are many manual pencil sharpeners available on the market that work without electricity. These can be a good alternative if you prefer not to deal with motorized sharpeners.
How to Test a DC Motor? Step By Step Guide
RLCTALK.COM
- Battery-powered sharpeners: Instead of an electric sharpener that needs to be plugged into a power outlet, you could try a battery-powered sharpener. These are portable and can be used anywhere.
- Other brands: If you’re open to trying a different brand, there are several other companies that manufacture pencil sharpeners. Look for reputable brands with good reviews to ensure you’re getting a quality product.
Ultimately, the best option depends on your personal preferences, budget, and how you plan to use the sharpener.
Conclusion
while the X-Acto pencil sharpener is effective, issues like blade dullness or motor problems can arise. Yet, with troubleshooting steps provided, many problems can be easily fixed. For those unable to resolve issues or seeking alternatives, manual or battery-powered sharpeners, as well as other brands, offer solutions.
Each option caters to different preferences and needs, ensuring users can maintain sharp pencils for their creative endeavors.
Some Related FAQs,
Remove shavings receptacle, tap gently to dislodge shavings, use a tool like a paper clip to remove remaining debris.
Remove pencils/debris, use a paper clip to dislodge jams, consider disassembling to access stuck objects, reassemble once cleared.
Unplug, remove mounting hardware if wall-mounted, lift away carefully; if portable, lift it off the workspace.


