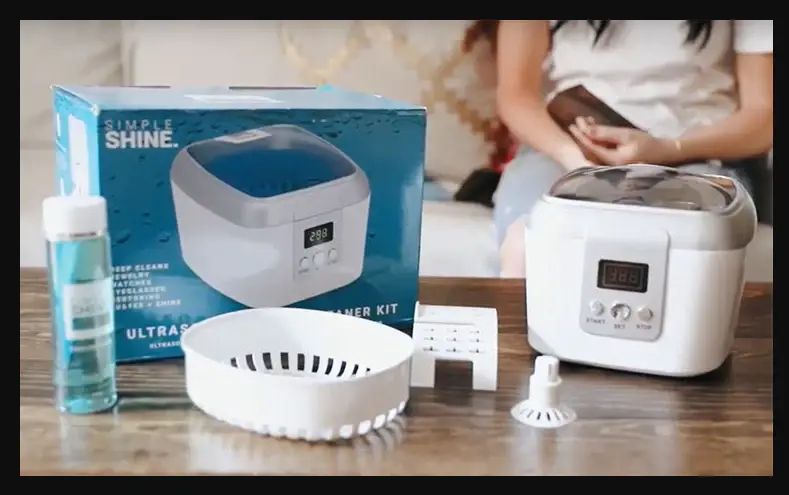
Ultrasonic Cleaner Not Vibrating: Troubleshooting and Maintenance Tips
Is your trusty ultrasonic cleaner not buzzing and vibrating the way it used to? Don’t worry; you’re not alone. Like any piece of machinery, ultrasonic cleaners can sometimes encounter issues that lead to decreased performance or complete breakdown. But before you panic, it’s essential to understand that many of these problems can be prevented with proper care and maintenance.
In this blog post, we’ll explore common signs that your ultrasonic cleaner is not working correctly, how to troubleshoot these issues, and essential maintenance tips to keep your machine running smoothly.
What makes an ultrasonic cleaner vibrate?

An ultrasonic cleaner vibrates by utilizing electrical energy from a generator to produce sound waves at frequencies typically starting around 40kHz. A key component in this process is the transducer, which consists of the frequency plate and the transducer itself.
Piezoelectric crystals are commonly used as the active element in many cleaning machines to generate these high-frequency vibrations.
What are the Signs Your Ultrasonic Cleaner Isn’t Working Properly?

Is there A Drop in Ultrasonic Power?
The primary purpose of an ultrasonic cleaner is to create high-frequency sound waves that produce tiny, powerful bubbles, removing dirt and contaminants from items submerged in the cleaning solution. If you notice that your cleaner is not as effective as before, it could be due to a drop in ultrasonic power.
Is there a Loss of Cleaning Efficiency?
As a direct result of reduced ultrasonic power, you might find that your cleaner needs to do an excellent job of cleaning your items.
Is there a Increased Chemical Consumption?
If you’re suddenly using more cleaning solutions than usual, your ultrasonic cleaner is struggling to clean efficiently.
Does it have Poor Drainage?
Proper drainage is crucial for the effective operation of your cleaner. If the drainage system isn’t working correctly, it can lead to residue buildup and reduced cleaning performance.
Is it showing Heating Issues?
Some ultrasonic cleaners come with a heating feature, which is essential for certain cleaning tasks. If your machine struggles to maintain the desired temperature, it might be time for a check-up.
Is it Noisy?
Ultrasonic cleaners should be relatively quiet. If you notice a significant increase in noise during operation, it could be a sign of an underlying issue.
Is it Leaking?
Any leakage from your ultrasonic cleaner is a clear indicator that something is not correct. It can affect not only the machine’s performance but also pose safety hazards.
Resmed AirSense 10 Heater Fuse Replacement; Step By Step Guide
rlc talk
How to Check If Your Ultrasonic Machine Is Working?
Before calling in the experts, there are some simple tests you can perform to check the status of your ultrasonic cleaner:
01. Power Check
Start by ensuring that the machine is properly plugged in and turned on. The fuse is likely burnt out if there’s no LED light, and you can’t see any visible sonic waves in the cleaning tank.
02. Check LED and Waves
If the LED comes on, but you don’t see ultrasonic waves in the tank, this might point to a possible burnt-out transducer or generator fault.
03. Check Aluminum Foil
For this test, place a piece of aluminium foil in the tank. Be careful not to let it touch the tank’s bottom. Run the machine for a short period, roughly 1–5 minutes. Afterward, check the foil. If the machine is working correctly, the foil should have dents and small holes in it, measuring around 1 to 4 millimeters. Irregularly sized dents and holes suggest a malfunction.
It’s advisable to repeat this test a few times, using different temperatures and solutions, to get an average result. If you’re certain that your machine is not working correctly after these tests, it’s time to call in an expert for a more in-depth inspection.
How to Prevent Ultrasonic Cleaner Breakdown?
The good news is that many issues with ultrasonic cleaners can be prevented with straightforward maintenance and care. Here are some essential tips to keep your machine in tip-top shape:
1. Use the Right Cleaning Solutions
Always use the recommended cleaning solutions for your specific ultrasonic cleaner. Some cleaning agents can be too acidic or harsh, damaging the machine over time. Additionally, ensure that you use the correct volume of cleaning solution.
2. Use Trays for Suspension
When placing items in the cleaning tank, use trays or baskets to suspend them so they don’t touch the bottom. Contact between items and the tank’s bottom can cause damage to the transducers, which are essential for generating ultrasonic waves.
3. Temperature and Cleaning Times
Pay attention to the recommended temperature and cleaning times for different tasks. Using the wrong settings can reduce cleaning efficiency or even damage your items and the machine.
4. Prevent Dry Running
Keep your tank dry. When the water level drops too low, the transducers can overheat, causing damage to the machine. Also, avoid adding cold water to a hot tank, which can lead to thermal shock and transducer damage.
5. Pre-Clean Heavily Soiled Items
Before placing heavily soiled items in the ultrasonic cleaner, consider pre-cleaning them to remove the worst of the dirt. This will help maintain the effectiveness of your machine and extend its lifespan.
6. Empty, Drain, Rinse, and Dry
After using your ultrasonic cleaner, always empty the tank, drain any remaining cleaning solution, rinse it, and allow it to dry. This routine maintenance prevents the buildup of mineral deposits and contaminants that can hinder your machine’s performance or cause damage over time.
By following these straightforward maintenance tips, you can significantly increase the lifespan and efficiency of your ultrasonic cleaner. Regular care and attention can help you avoid the frustration of dealing with a malfunctioning machine.
If, despite your best efforts, you still need help with your ultrasonic cleaner, feel free to contact experts like EJ Ultrasonics, who specialize in repairing and servicing these machines. They can provide the necessary repairs and maintenance to get your cleaner back in optimal working condition.
Demystifying the Inner Workings: How Does a 2-Wire Solenoid Valve Function?
rlc talk
Conclusion
In conclusion, when your ultrasonic cleaner stops vibrating as it should, it’s not necessarily the end of the world. By paying attention to signs of trouble, conducting simple tests, and performing regular maintenance, you can keep your ultrasonic cleaner in excellent working condition for years to come. Remember, a well-maintained machine is a reliable and efficient one.


![What is Exposed electrical conduit? [Pros and Cons Included]](https://www.rlctalk.com/wp-content/uploads/2023/02/What-is-Exposed-electrical-conduit-Pros-and-Cons-Included-768x576.jpg)
