How to Cut Flexible Metal Conduit? Must Read
Accurate cutting of flexible metal conduits is essential for proper installation in electrical and construction projects. Understanding the tools and techniques for cutting this type of conduit is crucial for achieving precise and clean cuts.
In this article, we will explore the process of cutting flexible metal conduits, covering the necessary tools, techniques, and safety measures to ensure successful results.
What are flexible metal conduits?
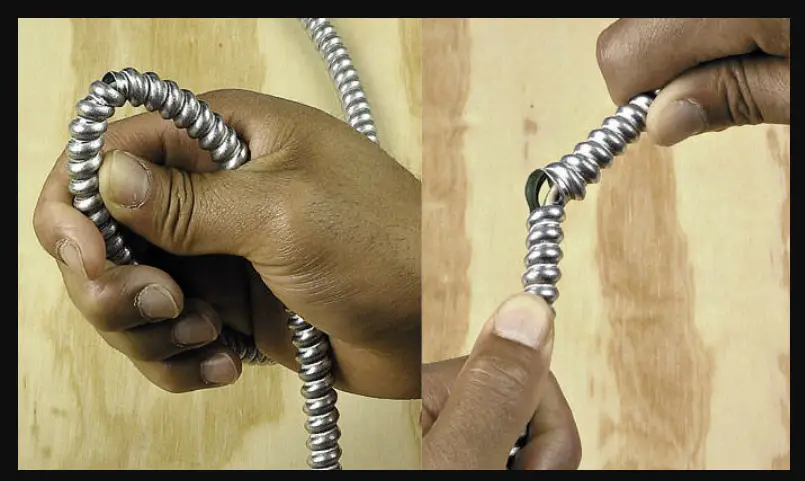
Before diving into the cutting process, it’s essential to understand what flexible metal conduit is and its applications clearly. A flexible metal conduit, also known as FMC or Greenfield, is a type of electrical conduit that provides protection for electrical wires in various settings.
It is commonly used in applications requiring flexibility, such as in areas with tight bends or where vibration resistance is necessary. Flexible metal conduit is available in different types, including steel and aluminium, and various sizes to accommodate different wire configurations.
What are the tools and materials required for cutting?

You will need specific tools and safety equipment to cut flexible metal conduits accurately. The essential tools for cutting flexible metal conduits include a handheld hacksaw or reciprocating saw, which can effectively cut through the conduit material.
Alternatively, a conduit or tubing cutter specifically designed for this purpose can provide precise and clean cuts. Additionally, it is important to wear safety goggles to protect your eyes from any flying debris, and work gloves to safeguard your hands during the cutting process.
What Techniques can be used for Cutting Flexible Metal Conduit?
Achieving accurate cuts in flexible metal conduits involves following specific techniques. Start by measuring the conduit to determine the desired length, and use a tape measure and marking tool to make clear and precise markings. When using a handheld hacksaw or reciprocating saw, securely hold the conduit and apply steady and even pressure while cutting.
Consider using a conduit or tubing cutter for even more precise cuts. Position the cutter correctly on the conduit and rotate it smoothly around the conduit to achieve a clean cut.
Technique 1: Using a Hacksaw
Step 1: Gather the necessary tools and materials.
- Hacksaw with a fine-tooth blade
- Safety goggles
- Tape measure or ruler
- Marker or pencil for marking the cutting line
Step 2: Measure and mark the conduit.
- Use a tape measure or ruler to determine the desired length of the conduit.
- Mark the cutting line using a marker or pencil. Ensure the line is straight and clearly visible.
Step 3: Secure the conduit.
- Place the conduit securely in a vise or clamp to prevent it from moving during the cutting process.
- Ensure the section to be cut is positioned firmly within the vise or clamp, allowing easy access for cutting.
Step 4: Start cutting.
- Put on safety goggles to protect your eyes from debris.
- Hold the hacksaw firmly, with one hand on the handle and the other on the frame near the blade.
- Position the hacksaw blade on the marked cutting line.
- Begin sawing back and forth steadily, applying light pressure to the blade.
- Continue sawing until the cut is complete, ensuring the blade stays aligned with the cutting line.
Step 5: Remove burrs and sharp edges.
- After cutting, inspect the cut end of the conduit for any burrs or sharp edges.
- Use a deburring tool or a file to remove rough edges, creating a smooth and clean finish.
Counting 10 THHN in 3-4 EMT: A Quick and Easy Guide
rlc talk
Technique 2: Using a Conduit Cutter
Step 1: Gather the necessary tools and materials.
- Conduit cutter specifically designed for cutting flexible metal conduit
- Safety goggles
- Tape measure or ruler
- Marker or pencil for marking the cutting line
Step 2: Measure and mark the conduit.
- Use a tape measure or ruler to determine the desired length of the conduit.
- Mark the cutting line using a marker or pencil. Ensure the line is straight and clearly visible.
Step 3: Position the conduit cutter.
- Open the jaws of the conduit cutter by turning the handle or adjusting the mechanism, allowing enough space for the conduit to fit.
- Align the cutting wheels of the conduit cutter with the marked cutting line.
Step 4: Cut the conduit.
- Place the conduit securely in the jaws of the conduit cutter, ensuring it is properly aligned with the cutting wheels.
- Squeeze the handles of the conduit cutter firmly, applying pressure to the cutting wheels.
- Rotate the conduit cutter around the circumference of the conduit, maintaining a steady grip and pressure.
- Continue rotating until the cut is complete, ensuring the wheels follow the marked cutting line.
Step 5: Inspect and clean the cut end.
- After cutting, inspect the cut end of the conduit for any rough edges or burrs.
- Use a deburring tool or a file to remove sharp edges, ensuring a smooth and clean finish.
Technique 3: Using a Power Tool (Reciprocating Saw)
Step 1: Gather the necessary tools and materials.
- Reciprocating saw with a metal-cutting blade suitable for flexible metal conduit
- Safety goggles
- Tape measure or ruler
- Marker or pencil for marking the cutting line
Step 2: Measure and mark the conduit.
- Use a tape measure or ruler to determine the desired length of the conduit.
- Mark the cutting line using a marker or pencil. Ensure the line is straight and clearly visible.
Step 3: Secure the conduit.
- Place the conduit securely in a vise or clamp to prevent it from moving during the cutting process.
- Ensure the section to be cut is positioned firmly within the vise or clamp, allowing easy access for cutting.
Step 4: Cut the conduit.
- Put on safety goggles to protect your eyes from debris.
- Position the reciprocating saw with the metal-cutting blade at the marked cutting line.
- Hold the saw with a firm grip and start the tool.
- Slowly and steadily guide the saw along the marked cutting line, allowing the blade to cut through the conduit.
- Apply gentle pressure to the saw, allowing the blade to cut.
Step 5: Inspect and clean the cut end.
- After cutting, inspect the cut end of the conduit for any sharp edges or burrs.
- Use a deburring tool or a file to remove any rough edges, ensuring a smooth and clean finish.
By following these techniques and steps, you can confidently cut flexible metal conduit with precision and achieve the desired results. Remember to prioritize safety by wearing appropriate protective gear and handling the tools responsibly.
What is Exposed electrical conduit? [Pros and Cons Included]
RLc talk
Finishing and Safety Measures

After cutting the flexible metal conduit, it is important to remove any burrs or sharp edges that may be present. Use a deburring tool or file to smooth out the cut ends, ensuring a safe and professional finish.
Additionally, it is crucial to collect and dispose of any metal shavings or waste material generated during the cutting process responsibly. Maintaining a clean work area helps prevent potential hazards and ensures a safe working environment.
Conclusion
Cutting flexible metal conduit accurately is a key step in electrical and construction projects. You can achieve precise and clean cuts for proper installation by understanding the tools and techniques involved.
Remember to prioritize safety by wearing the appropriate protective equipment, and dispose of waste material responsibly. By following these guidelines, you can confidently cut flexible metal conduit and ensure successful project outcomes.


